
Nothing says comfort food quite like a beautifully cooked beef brisket, right? This quintessential barbecue staple is often grilled to perfection outside. However, what if I told you that you can achieve that same tender, flavourful deliciousness right in your oven? That’s right—cook the perfect beef brisket in your oven, no smoker needed.
Brisket can be a bit intimidating. But with the right techniques, you can impress your friends and family with a mouthwatering meal. From choosing the ideal cut to mastering the low and slow cooking methods, every step plays a crucial role in transforming your cut of meat into a juicy masterpiece. Plus, it’s a fantastic option for gathering around the dinner table, especially during those cosy nights in.
So, if you're ready to elevate your cooking game and learn how to cook the perfect beef brisket in your oven, stick around. We’ll guide you through everything you need to know, from selection to serving. This ensures that your brisket is anything but boring! With our tips, you'll master how to cook the perfect beef brisket in your oven.
Choosing the right cut of brisket is crucial for a successful cooking experience, and it mainly boils down to the brisket flat versus the point cut.
The brisket flat is leaner, with a more rectangular shape, making it easier to manage and cook. It's the go-to choice for those looking to slice the meat into tender slices without dealing with much excess fat. If you’re new to cooking brisket, the flat might be your best bet.
On the other hand, the brisket point features an extra layer of meat atop a portion of the flat. This fattier and elongated cut is perfect for creating those delicious burnt ends everyone loves. The extra layer of fat renders during the slow cooking process, infusing the meat with moisture and flavor.
A key consideration is the fat cap, present on both cuts. Don’t trim it all away—let it render and enhance your dish’s flavor and tenderness.
Here's a quick comparison:
| Feature | Brisket Flat | Point Cut |
|---|---|---|
| Shape | Rectangular | Elongated |
| Fat Content | Leaner | Fattier |
| Cooking Ease | Easier to manage | More challenging |
| Ideal For | Tender slices | Burnt ends |
Select based on your desired outcome and cooking confidence!
Cooking a tender and flavorful beef brisket is an art, and dry brining is your secret weapon in this culinary journey towards learning how to cook the perfect beef brisket in your oven. The tough cut of meat can be transformed into tender slices with the right touch of dry brining. Here's why it's crucial:
Quick Steps for Dry Brining:
Use this trick, and your cooked brisket will be the star of any meal!
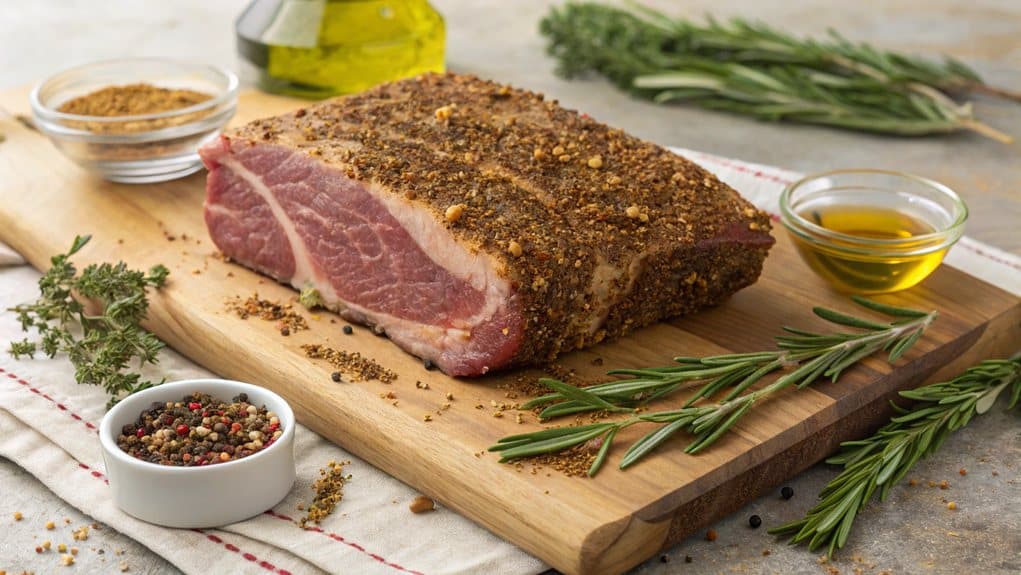
Getting the most out of your beef brisket starts with a solid seasoning technique. Here's how to achieve maximum flavor:
By following these steps, your beef brisket will be packed with robust flavors that make every bite a delight!
Cooking brisket to perfection is all about mastering the art of the "low and slow" method. This technique involves cooking tough cuts of meat like brisket at low temperatures, typically between 120°C and 160°C, for extended periods. The magic? It allows connective tissue to break down into gelatin, making for a tender, mouthwatering piece of meat.
Here's a quick guide:
Table: Cooking Time
| Weight of Brisket | Cooking Time (Hours) |
|---|---|
| 0.45 Kilograms | 1 Hour |
| 1.4 Kilograms | 3 Hours |
| 2.27 Kilograms | 5 Hours |
Remember, patience is key. Enjoy the aroma, and look forward to delicious brisket sandwiches or tender slices to wow your guests!
Alright, let's get your oven all set up for cooking that perfect beef brisket! First things first, preheat your oven to 150°C. This is just the right temperature to transform that piece of meat into tender slices.
Next, grab a large roasting pan. It's important to have a rack inside to elevate the brisket. This helps with even cooking and keeps the brisket from sitting in its own juices. Now, crisscross a couple of sheets of aluminum foil over the rack. This creates a loose cover to trap moisture without touching the brisket.
Underneath the rack, line the roasting pan with foil as well. This is your drip catcher, saving you from a cleaning nightmare! When you pop the brisket in, cover the pan tightly with foil. This step is crucial to keep all those flavorful juices locked in during the slow cooking process.
Here's a quick checklist for your setup:
You're all set to take on that brisket recipe and cook with confidence!
With your brisket marinated to perfection, you're now ready for the slow cooking process. Stay tuned for the next steps in achieving tender slices of this delicious piece of meat!
When it comes to cooking the perfect beef brisket, temperature is key! Ideally, aim for an internal temperature of just over 200°F (approximately 93°C), specifically around 203°F (about 95°C), to achieve that tender brisket goodness. Here's how you can work through the cooking process:
Low and Slow Cooking:
Searing for Flavor:
The Final Touch:
Here's a quick rule of thumb: Always check the internal temperature for the perfect balance of flavor and tenderness. Now you're all set to craft a cooked brisket that's not just a meal but an experience!
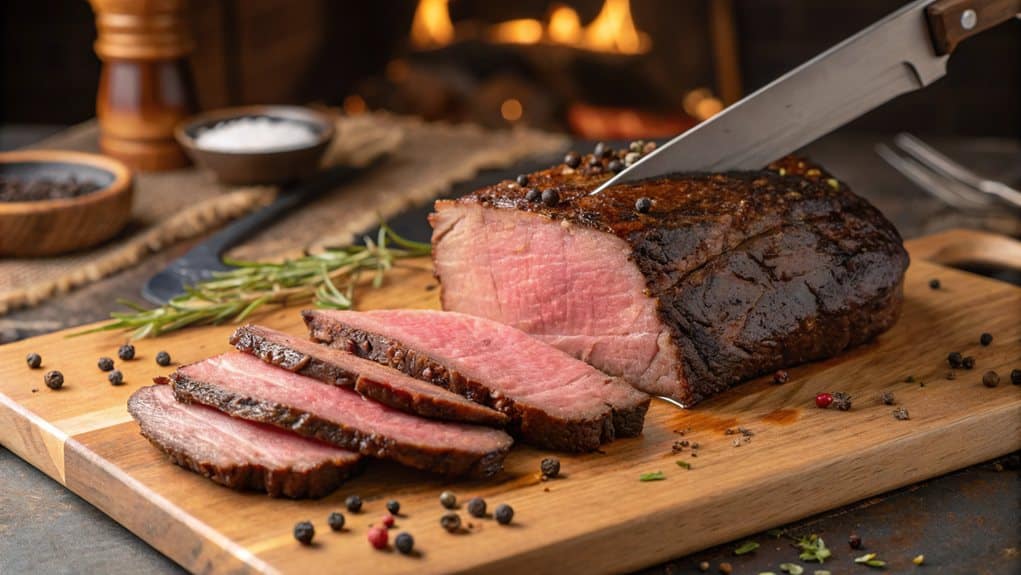
When cooking the perfect beef brisket, a meat thermometer is your best friend. To get tender slices, you'll want to ensure the internal temperature reaches between 195 to 205 degrees Fahrenheit. Here’s how you can use a meat thermometer to achieve brisket bliss:
Using a meat thermometer not only helps you hit the right internal temperature but also ensures your cooked brisket is mouthwateringly tender, making it perfect for brisket sandwiches or any scrumptious dish you have in mind.
Cooking a beef brisket to perfection is all about timing and patience. The rule of thumb is to allow about 1 hour of cooking time per pound of meat, plus an additional 30-60 minutes for preparing any sauce you'd like. If you're dealing with a specific weight, here's a simple guide:
| Brisket Weight (kgs) | Cooking Time (hrs) (120°C) |
|---|---|
| 1.8 | 4 to 5 |
| 2 | 5 to 6 |
| 2.2 - 2.7 | 5 to 6 |
For a brisket weighing 1.8kg, expect it to cook in approximately 4 to 5 hours to produce tender slices. If your brisket weighs 2kg, it's wise to extend the cooking time by an hour for optimum tenderness, particularly if you're aiming for brisket sandwiches. For larger pieces of meat, like 2.2 - 2.7kg, plan for about 5 to 6 hours in the oven set at 120°C.
Remember, the key is ensuring the brisket reaches an internal temperature of 82 to 93 degrees centigrade to break down the connective tissues and achieve that tender brisket magic.
Resting periods are an essential step in cooking the perfect beef brisket. After you've spent hours slow-cooking that tender brisket, it's important not to skip this final phase. Allowing your brisket to rest for at least 15 to 30 minutes, covered with a sheet of foil, is key to achieving the best texture and flavor.
During this time, the juices redistribute throughout the muscle fibres, preventing them from spilling out when you slice it. This period also helps the internal temperature rise to an ideal 93 degrees Celsius, an important factor in optimising tenderness.
Here's a quick table to summarize the key points:
| Action | Benefit |
|---|---|
| Resting 15-30 mins | Redistributes juices for better texture |
| Tenting with foil | Keeps brisket warm |
| Temperature rise | Reaches 93°C for tenderness |
Once cooked, transfer your brisket to a cutting board and tent it with foil. This helps maintain warmth and allows the cooked brisket to reabsorb some of its flavoursome juices. Proper resting ensures you serve up tender slices that melt in your mouth.
Slicing and serving your brisket can elevate your culinary experience to the next level! To ensure tender slices that melt in your mouth, make sure you slice your beef brisket against the grain using a sharp chef’s or serrated knife. This technique not only creates a more tender bite but also distributes the juices and flavors evenly throughout the piece of meat.
With these tips, you're all set to slice and serve your tender brisket in style. Enjoy every flavorful bite!
Planning brisket portions for gatherings? Keep it simple! Here’s a quick guide to help you serve just the right amount:
Here's a quick table for reference:
| Brisket Size | Raw Weight | Cooked Weight | Serves |
|---|---|---|---|
| 1.8 kg | 1.8 kg | - | 8 people |
| 2.3 kg | 2.3 kg | 1.4-1.6 kg | 6 people |
| 1.2-1.5 kg | 1.2-1.5 kg | - | 6 adults (with sides) |
| Brisket Size | Raw Weight | Cooked Weight | Serves |
|---|---|---|---|
| 4 pounds | 4 lbs | - | 8 people |
| 5 pounds | 5 lbs | 3-3.5 lbs | 6 people |
| 2.5-3 pounds | 1.2-1.5 kg | - | 6 adults (with sides) |
Remember these tips next time you're slicing up your brisket for a perfect gathering spread!
Looking to serve up your oven-baked beef brisket with a twist? Here are some creative side dish ideas to make your meal shine!
Classic Sides:
Fresh Salads:
Hearty Sandwiches: Piling tender slices of brisket onto sandwich rolls with a side of BBQ sauce or mustard makes for a robust meal.
Flavorful Vegetables:
Comforting Breads:
| Side Dish | Quick Prep Time | Flavor Profile |
|---|---|---|
| Mashed Cauliflower | Yes | Creamy |
| Garlic Bread | Yes | Savory |
| Arugula Salad | Yes | Fresh, Peppery |
Mix and match these sides to create the perfect meal experience with your beef brisket!
Got leftover brisket? No worries! Here's how to store it right:
For immediate munchies, pop your cooked brisket in an airtight container and stash it in the fridge. It'll stay good for up to 5 days. Planning to savor it later? Just freeze it, and you’re set for up to 3 months.
For the ultimate flavor experience, slice the brisket against the grain and immerse it back into its savory juices before storing. This keeps those tender slices deliciously moist.
In the mood to stock up for a while? Vacuum-seal that brisket! It'll stay fresh for a solid 18 to 24 months. Perfect for those future cravings.
Reheating is a breeze—just warm it slowly at a low temperature to keep it juicy and tender.
Quick Storage Tips:
Stay brisket-ready and enjoy tender brisket sandwiches anytime!
Cooking a beef brisket to perfection in your oven can be a delicious journey! Here, we tackle some common FAQs to help you master this savory art.
The magic number for brisket doneness is an internal temperature of 200 degrees Fahrenheit. To check, insert a leave-in probe thermometer into the thickest part of the brisket, avoiding the fat layer for accuracy. Start by cooking until it hits around 190 degrees, then uncover it and let it roast until it reaches 200 to 205 degrees. If it stalls, just re-cover it with foil if it hangs there for over 30 minutes. And don't forget the rest! Let your brisket chill at room temp for 30 minutes post-bake before slicing against the grain. This keeps it juicy and oh-so-tender!
Absolutely, but with care! You can increase the oven temperature to 300 degrees Fahrenheit once your brisket's interior hits 145 degrees to add extra sear to the fat layer. Most prefer starting at a lower temp, like 250 degrees, for tenderness, then boosting to 350 degrees for the last 30-60 minutes to enhance flavor and texture. Just remember, while aiming for that golden brown crisp, keep an eye on tenderness so your brisket remains juicy and soft.
Reheating brisket is all about maintaining its moisture. For the best results, warm it slowly in an oven at 250 degrees F, wrapped snug in aluminum foil. Have sliced brisket? A microwave-safe dish with a dash of beef broth can do wonders to keep it moist. Prefer a skillet? Simmer slices over low heat with a splash of beef broth or some BBQ sauce. For those unsliced chunks, cover them and reheat in their smoking liquid at 275 degrees for thorough warming. Pro tip: Pre-slice before storing; it's easier and helps the meat soak up its juices while reheating.
For the tender brisket of your dreams, start with a generous dry rub and let it marinate in the fridge overnight. Trim the fat, leaving a 1/4-inch cap for flavor and moisture retention. Cook at a low 300°F for about 18 minutes per pound. You'll know it's perfectly tender when your knife or fork slides in easily. Post-cook, let it rest for at least 10 minutes before the big slice—this step is crucial for juiciness! Lastly, slice against the grain to effortlessly break up those muscle fibers for melt-in-your-mouth tenderness.
Who knew cooking a brisket could be so steamy and exciting? Now you're all set to tackle your brisket with confidence. Happy cooking!
Cooking the perfect beef brisket is an art, and sometimes, things don't go exactly as planned. Whether it ends up too dry, over-seasoned, or tough, don't worry—there are fixes for all these brisket blunders. Let’s dive in and troubleshoot those common brisket issues.
A dry brisket can be a disappointment, but there's no need for despair. To bring back some moisture, place the sliced meat back into the cooking sauce. This technique allows the brisket to absorb the liquid, enhancing its flavors. Also, consider cooking the brisket low and slow, keeping the oven temperature between 250°F and 325°F, which helps the meat retain its juices. Once cooked, let the brisket rest for at least 15 minutes while covered to allow the juices to redistribute. If your brisket ended up dry due to insufficient seasoning, next time, go for a generous amount of dry rub before cooking to lock in the moisture. Remember to avoid searing the brisket at high temperatures, as this makes meat tougher and drier—stick to slow cooking.
Over-seasoned brisket can overpower your tastebuds, but there are methods to balance out the flavors. If you suspect you've been too generous with the dry rub, try removing some before cooking. Cooking the brisket slower and at a lower temperature can help diffuse strong flavors, and add a liquid component such as beef broth to dilute excess seasoning. If you find it over-spiced, consider using a larger pan during cooking to allow for more evaporation and flavor reduction. To further counteract the seasoning, serve your brisket with unseasoned sides, like steamed vegetables or coleslaw, for a flavor balance.
Is your brisket as tough as an old boot? It likely just needs more time in the oven. Slow cooking is key; allowing the connective tissue to break down and tenderize the meat. Remember, sealing the foil pouch tightly during cooking is crucial to keeping moisture inside. If your leftover brisket is unsliced and tough, pop it in a covered baking dish with water or beef broth and bake it at 300°F for 30-60 minutes. When slicing the brisket, do it against the grain. This breaks up the tough muscle fibers, making the meat more tender. Lastly, once your brisket is done cooking, always allow it to rest for at least 10 minutes before slicing to preserve its juices.
By following these tips, you can turn any brisket mishap into a masterpiece. Enjoy your tender, flavorful brisket with confidence, whether it’s in sandwiches, as a main dish, or served leftover brisket-style!
Congratulations! You've cooked the perfect beef brisket in your oven, creating a dish with a beautifully crispy fat cap and tender, juicy meat. By dry brining your brisket, you've unlocked the ultimate flavor and texture, highlighting both the lean "flat" and the fattier "point" portions of this versatile piece of meat.
Here's how to savor every bite of your delicious creation:
| Suggested Pairings |
|---|
| Creamy Horseradish |
| BBQ Sauce |
| Pickled Vegetables |
| Fresh Slaw |
Don't forget to store any leftover brisket in an airtight container, preserving its flavor for delightful meals later. Enjoy the fruits of your labor and the memorable dining experience it provides. Your perfectly cooked brisket is the highlight of any gathering!
