
When you're selling steak all day, you inevitably get asked how best to cook it, and to be honest, we don't really have one single answer, as it all depends on what equipment you have, what you're doing it for and how much effort you want to spend on it. Now, for a tomahawk, you really want to spend a bit more effort on this cut so you get the most out of it. The reverse sear tomahawk steak method is a bit more time-consuming than throwing it on the BBQ, but it is a sure way to get a perfectly cooked steak.
That extra effort pays off in measurable ways: reverse-seared steak retains significantly more moisture than a traditional sear (the exact numbers are below). For grass-fed Angus tomahawk beef that runs $75–87 at current Pryde Butchery pricing, that difference is real money — and, more importantly, real quality on the plate. Using the reverse sear tomahawk steak method ensures you get the most out of your cut.
The tomahawk's problem isn't the cut. It's the thickness. At 5cm from edge to centre, a traditional sear-first method creates a 5–10mm grey band of overcooked meat before the middle ever reaches medium-rare. Reverse searing fixes this by doing the low-temperature work first, then finishing with an aggressive sear. You get edge-to-edge doneness and a proper crust. When done well, the reverse sear tomahawk steak method is the most consistent for a thick cut like this.
New to the tomahawk cut? Start with how to cook a tomahawk steak — what you need to know, our foundational guide covering the cut, grading, and sourcing. This guide will also touch on the reverse sear tomahawk steak method for best results.
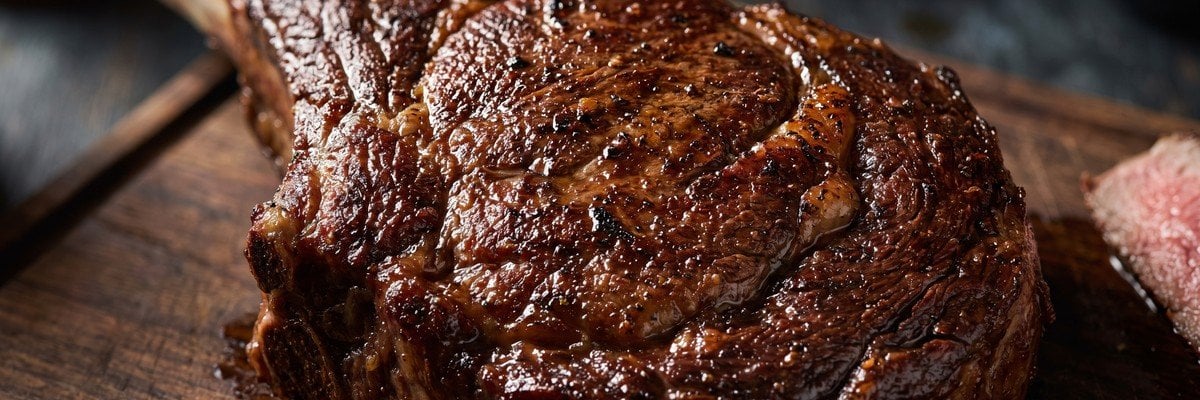
Three mechanisms explain why the method works so well for thick cuts.
The Maillard reaction needs a dry surface. The browning chemistry responsible for crust flavour requires surface temperatures above 140°C. Water boils at 100°C — well below this threshold. A wet steak surface can't reach Maillard temperatures, so it steams instead of searing. The low oven phase dries the surface passively over 45–75 minutes, so when the tomahawk hits a screaming-hot pan, it starts searing immediately rather than expelling steam for the first 60 seconds.
Cathepsin enzymes tenderise the meat during the low-heat phase. These enzymes, naturally present in beef muscle, remain active below 50°C (PMC). During the reverse sear's oven phase, your tomahawk spends the entire cook time in this enzyme-active zone. A traditional sear spends seconds there. The extra tenderisation is measurable — the same 2022 Foods journal study found reverse-seared steaks scored higher for texture and lower for hardness and chewiness.
The temperature gradient stays manageable. At high heat, the outer layers of a thick steak cook far faster than the centre. By the time the centre of a 5cm cut reaches 54°C conventionally, the outside has already blown past 70°C+. Reverse sear closes this gradient by bringing the entire steak to near-target temperature slowly, then using the sear only for crust formation — not internal cooking.
| Factor | Reverse Sear | Traditional Sear |
|---|---|---|
| Grey band (overcooked edge) | 1–2mm | 5–10mm |
| Moisture loss | 18.43% | 23.56% |
| Crust quality | Very high | Good |
| Overcooking risk (5cm+ cuts) | Low | High |
| Post-sear rest required | 5 min | 10–15 min |
| Total active cook time | 60–90 min | 20–30 min |
| Best for 5cm+ cuts? | ✓ Yes | ✗ No |
Source: PMC/Foods Journal (2022), AmazingRibs.com / Prof. Greg Blonder
Equipment:
- Instant-read or probe meat thermometer — the single most important piece of equipment here; don't guess
- Wire cooling rack + rimmed baking tray
- Cast iron skillet or gas BBQ or Weber kettle with charcoal
- Tongs and a fish slice
Ingredients:
- 1 grass-fed Angus tomahawk steak, 1.3–1.5kg
- Flaky salt and cracked black pepper
- 30g unsalted butter
- 2 garlic cloves, lightly crushed
- 3–4 sprigs fresh thyme or rosemary
- High smoke-point oil: avocado oil, beef tallow, or vegetable oil
- Aluminium foil (to wrap the bone before searing)
Time: 2–3 hours total from fridge to table. Allow 12–24 hours overnight for dry brining — it makes a noticeable difference.
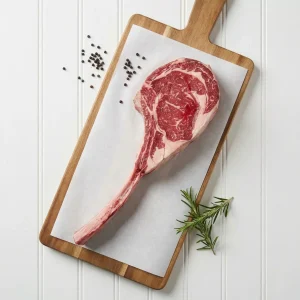
Before the steps, here's the full timeline so you can plan your cook:
Overnight dry brining is the single biggest quality upgrade you can make beyond choosing the method. Salt draws moisture to the steak's surface through osmosis. Within the first 10–30 minutes, that brine sits on the outside — bad timing to cook. But after 40+ minutes, the brine starts reabsorbing into the muscle, carrying salt deeper into the fibres and leaving the surface noticeably drier (The Grilling Science). By morning, the surface is significantly drier, and the seasoning has penetrated properly.
How to dry brine a tomahawk:
1. Season both sides and the edges generously with flaky salt and cracked black pepper. Press it in by hand — don't sprinkle from a height, as it distributes unevenly.
2. Set the steak on a wire rack over a tray. The rack lifts it so air circulates underneath.
3. Refrigerate uncovered for 12–24 hours.
Don't exceed 24 hours. Beyond that, the surface takes on a firmer, slightly cured texture from extended salt contact. The overnight window is the sweet spot.
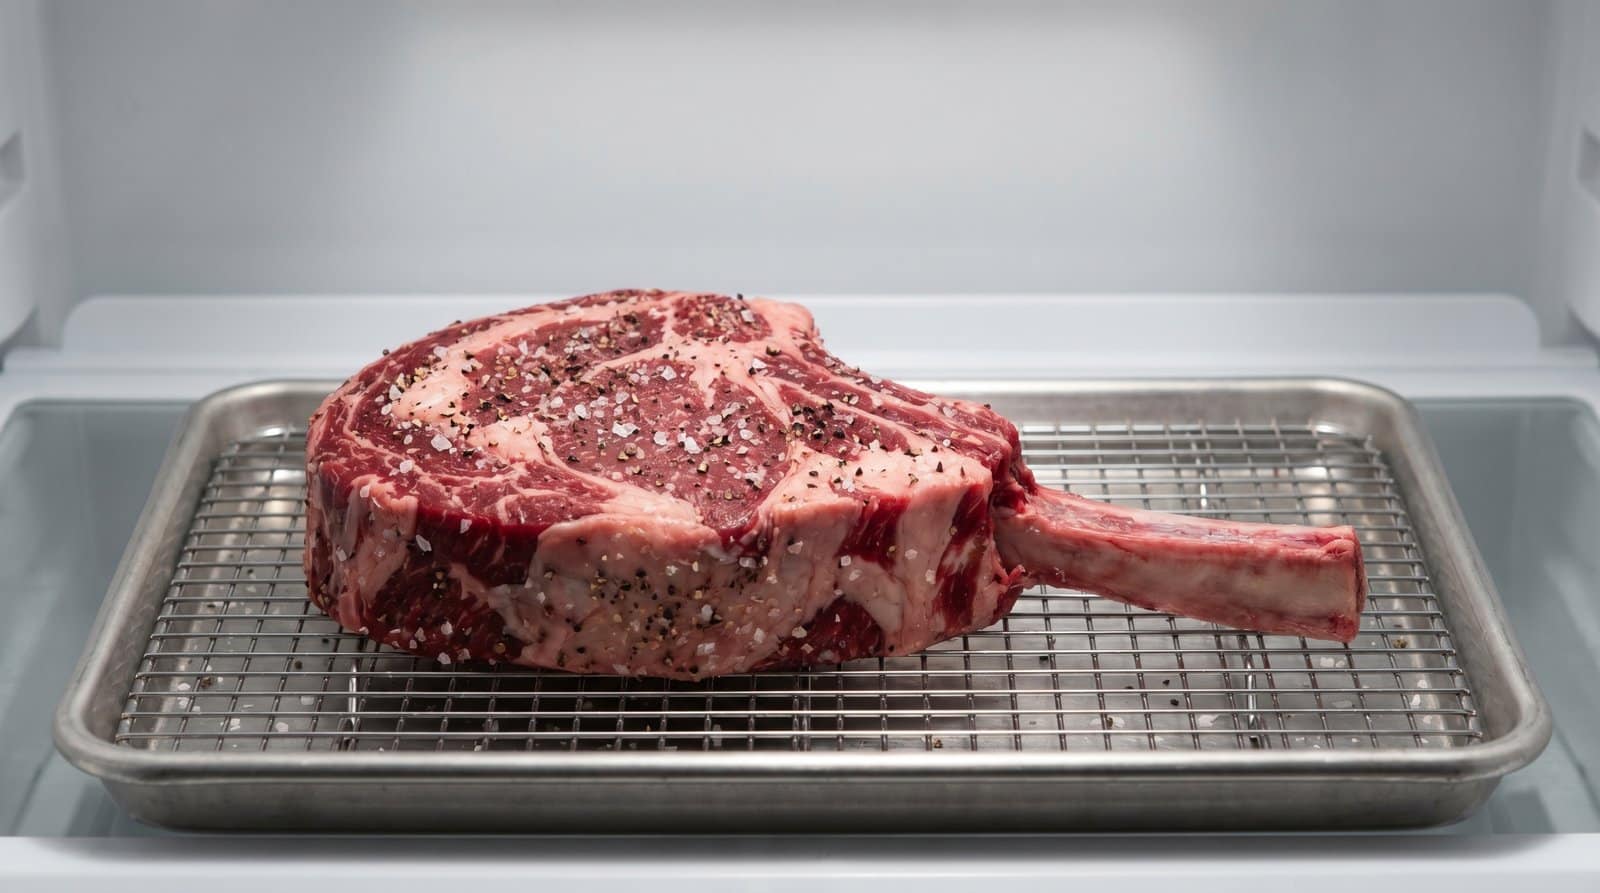
Remove the steak from the fridge 30–45 minutes before you plan to start cooking. This matters more for a grass-fed tomahawk than it does for a thinner cut. Grass-fed beef has roughly 2–3% less intramuscular fat than grain-fed (The MeatStick), which means less thermal buffering. A cold centre takes longer and more heat to reach, widening the risk of an uneven cook.
Don't overthink it — you're not actually warming the centre to any significant degree. The centre of a steak left on the bench for 45 minutes barely shifts from fridge temperature. The real benefit is giving yourself a consistent, predictable baseline before the oven phase begins.
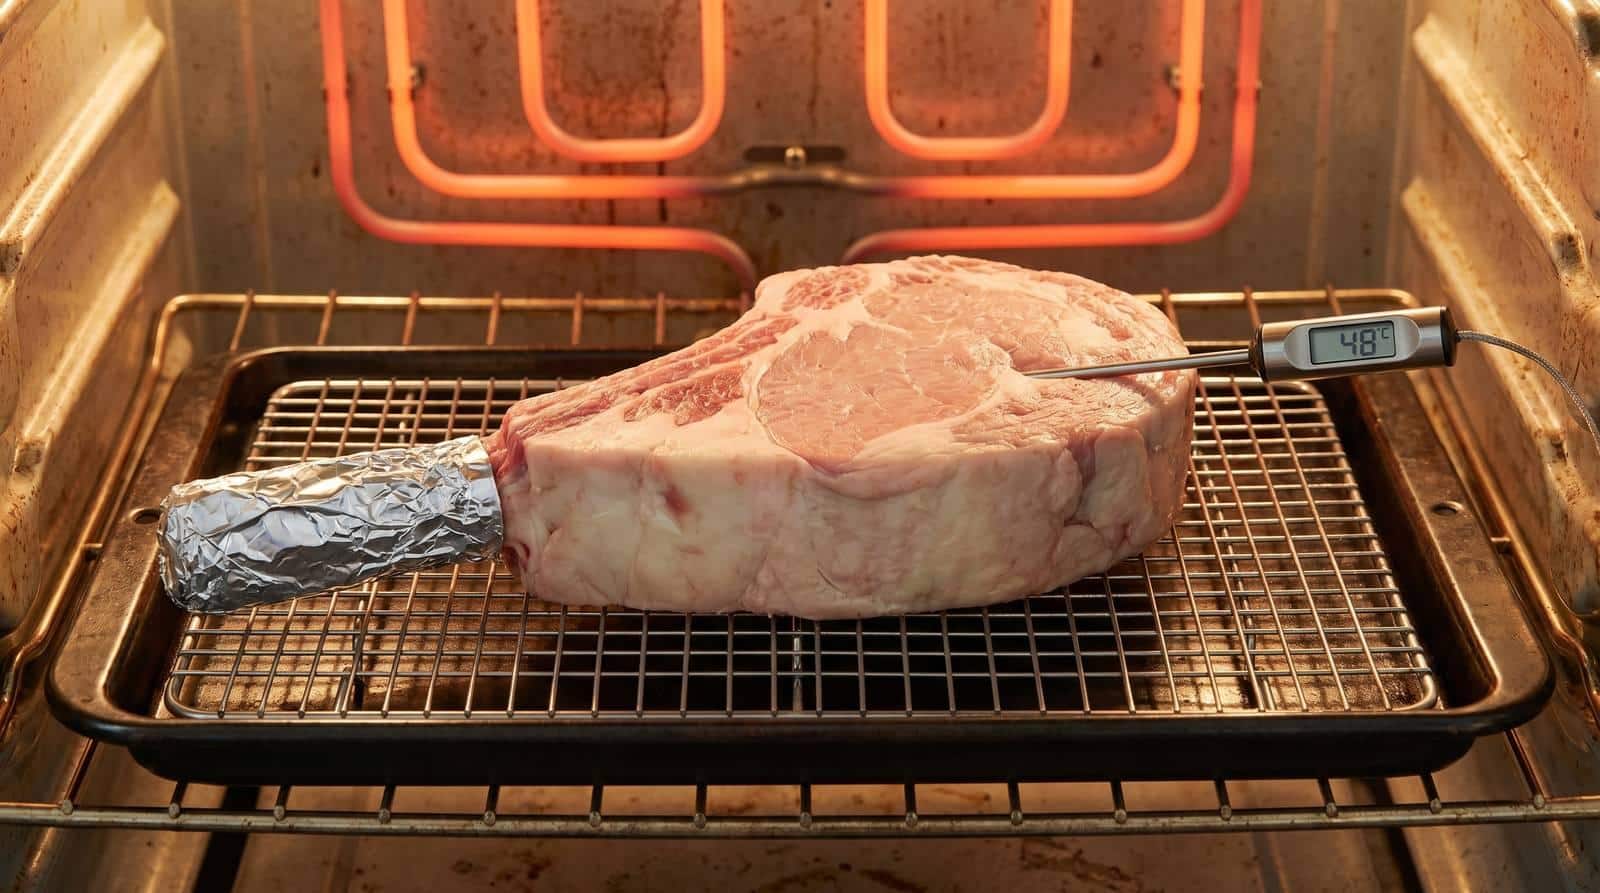
Set your fan-forced oven to 110–120°C (conventional oven: 130–140°C). Place the tomahawk on a wire rack set over a rimmed baking tray — the rack allows hot air to circulate underneath, drying all surfaces evenly rather than letting the underside sit in its own moisture.
Probe placement is critical. Insert your thermometer horizontally into the thickest part of the meat, 2–3cm away from the bone. The bone reads differently from the surrounding muscle — it sits at a lower temperature during the oven phase because it's a poor heat conductor at low temperatures, and it reads higher near the sear because it retains heat. Probe the meat, not the bone.
Cook until the probe reads 48–49°C. Check after the first 45 minutes, then every 10 minutes. A 1.3–1.5kg grass-fed tomahawk at 110–120°C fan-forced typically takes 45–75 minutes to reach temperature. Grass-fed beef cooks approximately 30% faster than grain-fed (J.J. O'Brien Ranch), so US recipes using grain-fed timing will run long. Pull at the temperature, not the clock.
Pull the steak from the oven once it hits 48–49°C. Don't sear it straight away. Rest it uncovered on the wire rack for 5–10 minutes before the pan or BBQ goes anywhere near it.
This rest has two functions. First, the surface temperature equalises, and any remaining surface moisture evaporates. The oven does most of the drying work, but this window finishes the job. A dry surface sears; a damp surface steams for the first 30–60 seconds, wasting the window when crust chemistry should be happening.
Second, the internal temperature rises slightly due to carry-over — usually by 1–2°C. You're heading from 49°C toward a sear that will push the centre another 4–6°C. Accounting for this carry-over means you won't overshoot your target doneness during the sear.
Your pan or grill surface needs to reach 250–290°C before the steak touches it (Weber AU). Below that, you're not searing — you're cooking in the steak's own moisture. This is the step that creates the crust, and heat is the only variable that matters here.
Wrap the bone first: Cover the long rib bone in a double layer of aluminium foil before the sear. The bone chars quickly on a hot grill or in a screaming cast iron pan, and burnt bone tastes unpleasant and makes the plate look rough. It takes 20 seconds.
Turn your range hood to maximum or open a window. It will smoke.
Preheat all burners to maximum with the lid closed for 10–15 minutes. The internal temperature should be above 260°C before you put the steak on. Place directly over the burners. Sear 1.5–3 minutes per side with the lid up. Add butter and herbs in a foil pouch to the side of the grill in the last minute, then spoon the melted butter over the steak before resting.
Open all vents fully. Consolidate all lit coals to one side. Once the steak reaches 48–49°C in the oven (Step 3), move it straight to the kettle and place directly over the coals. Sear 1–2 minutes per side. The charcoal delivers a distinct smoke-char flavour the cast iron can't replicate — worth trying if you have a kettle set up. Baste with butter in the final minute.
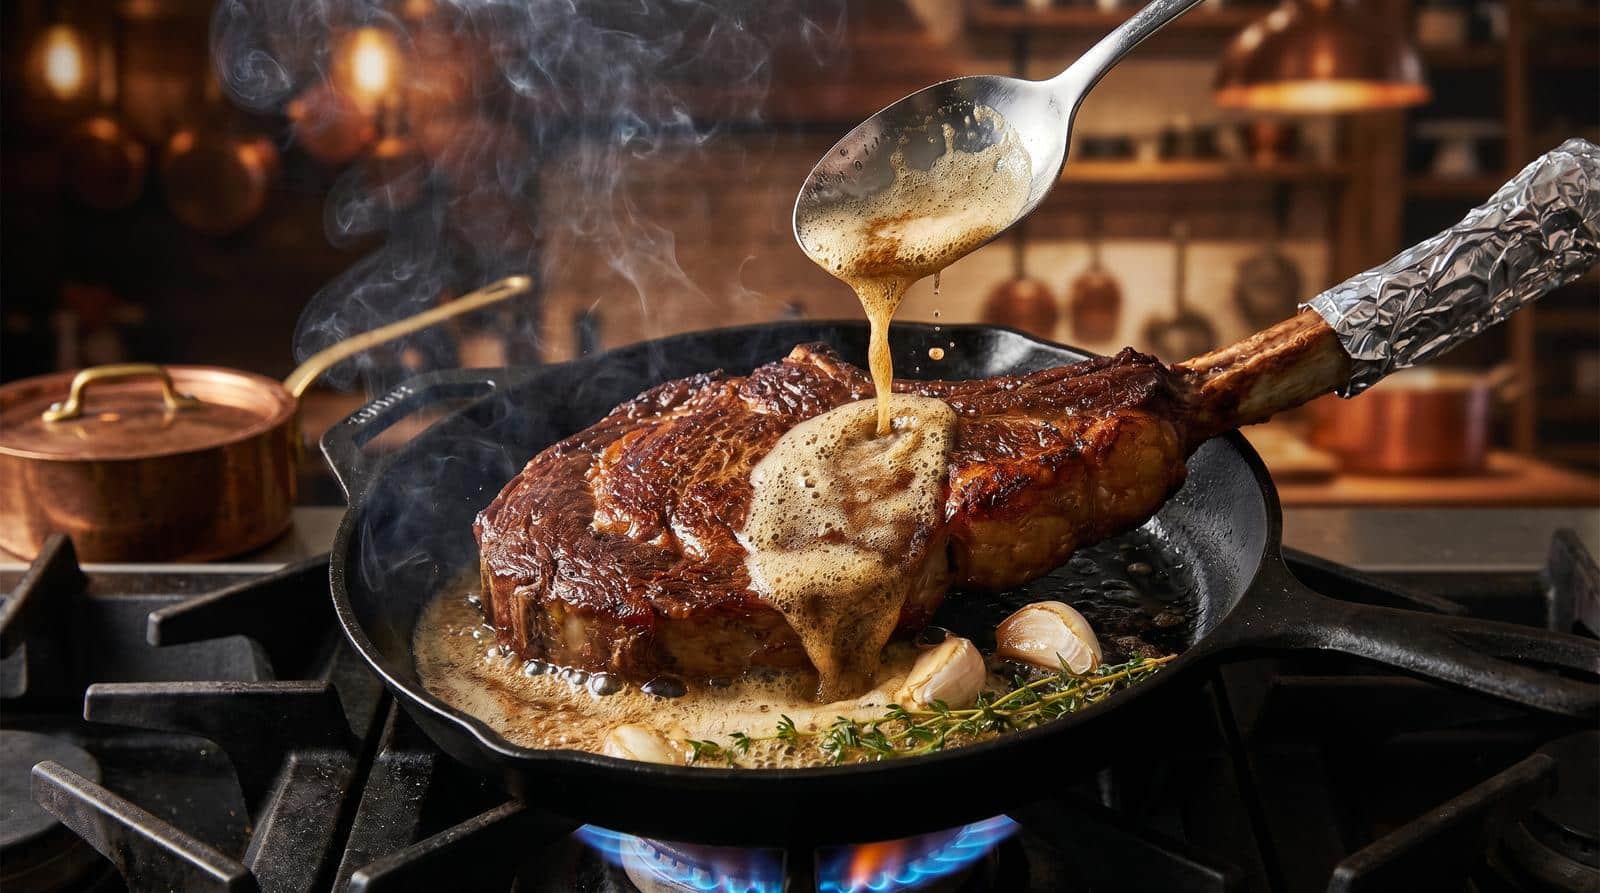
Five minutes. Not fifteen. The reverse sear method redistributes juice during the long oven phase, so the post-sear rest is far shorter than traditional cooking requires.
There's one tomahawk-specific reason to rest at all: the bone conducts heat after you pull the steak off the heat. The long rib bone absorbs substantial heat during the sear and keeps transferring it into the surrounding meat once the steak is off the grill or pan. A 5-minute rest lets this thermal carry-over equalise before you cut into the meat adjacent to the bone (Cotton Tree Meats AU). Without it, the slices closest to the bone can be a degree or two more done than the rest.
To slice: Cut along the bone with a sharp knife to separate the meat in one piece. Slice the meat against the grain in 1–2cm strips. On a tomahawk, the muscle fibres run roughly parallel to the bone — so slicing perpendicular to the bone cuts across the grain correctly.

If you're following a US recipe that specifies 225°F or 250°F, here's how to convert for an Australian fan-forced oven:
| US Recipe (°F) | Conventional °C | Fan-Forced °C (AU) |
|---|---|---|
| 225°F | 107°C | 87–95°C |
| 250°F | 121°C | ~101°C |
| 275°F | 135°C | 115°C |
| 300°F | 149°C | 129°C |
| ✓ Recommended for tomahawk (AU) | 110–120°C fan-forced | |
Source: BakeClub AU, RecipeTin Eats, Cooking With Danie AU
If you're unsure whether your oven is fan-forced, look for a fan symbol on the dial or in the display. Most Australian domestic ovens built in the last 15 years are fan-forced by default.
1. Salting in the 10–30 minute window
This is the most fixable mistake. At 10–30 minutes post-salt, moisture has been drawn to the surface but hasn't reabsorbed. You're starting with a wet steak. Season overnight or immediately before cooking — never within 10 to 30 minutes beforehand.
2. Probing near the bone
The bone throws off the reading in both directions — lower during the oven phase, higher after the sear. Always probe horizontally at the thickest meat point, 2–3cm from the bone, with the probe tip sitting in the true centre of the cut.
3. Skipping the pre-sear rest
The oven dries the surface — but then the steak sits on the rack for however long it takes you to get the pan up to temperature. If you're rushing, the surface isn't dry enough. Five minutes of deliberate resting on the rack before searing makes a visible difference to crust quality.
4. Trusting timing over temperature
Cook times vary based on oven calibration, starting temperature, bone proximity, and whether the beef is grass-fed or grain-fed. The only reliable signal is internal temperature. Without a thermometer probe, you're guessing.
5. Not wrapping the bone
The long rib bone is exposed directly to 290°C+ surface heat during the sear. It chars, the charred material tastes bitter, and it looks rough on the plate. Thirty seconds and a piece of foil prevents it entirely.
Use a fan-forced oven at 110–120°C (conventional: 130–140°C). Pull the steak when the internal temperature reads 48–49°C. After a 5–10 minute pre-sear rest and 90 seconds to 3 minutes of searing per side, the tomahawk will finish at 54–57°C — the medium-rare range confirmed by ThermoWorks and RecipeTin Eats (ThermoWorks).
A 1.3–1.5kg grass-fed tomahawk typically takes 45–75 minutes in a 110–120°C fan-forced oven to reach 48–49°C internally. Add 30–45 minutes to come to room temperature, 5–10 minutes of pre-sear rest, 3–6 minutes of searing, and 5 minutes of post-sear rest. Budget 2–3 hours from fridge to table — plus overnight dry brining if you're doing it properly.
Yes, but only for 5 minutes — much less than a traditionally cooked steak requires. Reverse searing redistributes moisture during the oven phase, largely eliminating the need for a long post-sear rest. The short rest is specifically for the bone: the long rib bone retains heat after the sear and continues conducting into adjacent meat for several minutes. Five minutes of resting lets this equalise and prevents overcooking near the bone.
Yes. A gas BBQ preheated to maximum works well — sear 1.5–3 minutes per side with the lid up. A Weber kettle with charcoal works even better: consolidate all coals to one side after the oven phase, then sear directly over the coals for 1–2 minutes per side. The charcoal delivers a smoke-char layer the cast iron can't replicate.
Yes, for the best results. Overnight dry brining (12–24 hours) gives salt time to complete the full osmosis cycle — drawing moisture out, then reabsorbing as brine that seasons deeper into the muscle and leaves the surface significantly drier. A drier surface sears more aggressively and produces a better crust. Salt beyond 48 hours creates a firmer, cured surface texture — stay in the 12–24 hour window.
You now have the complete method: overnight dry brine, 110–120°C fan-forced oven to 48–49°C internal, 5–10-minute pre-sear rest, maximum-heat sear with a butter-baste finish, and a 5-minute rest. It works with a cast iron on a gas burner, a gas BBQ, or a Weber kettle — use what you have.
This guide is reviewed by the Pryde Butchery team and updated as techniques and equipment change. Have a sourcing question? Get in touch or read more about Pryde Butchery.
Want to compare cooking methods? How to cook the perfect tomahawk steak with a frying pan covers the stovetop approach if you want a quicker cook without the oven phase, or try our sous vide tomahawk steak guide for edge-to-edge precision using a water bath. And for the full cut guide, how to cook a tomahawk steak — what you need to know is the place to start.
